
the Anatomy of a knot
Knots may look complicated at first, but nearly every knot is built from the same few rope parts and simple movements. Once you understand the anatomy of a knot, learning new knots becomes dramatically easier. Whether you’re tying fishing knots, camping knots, climbing knots, or decorative rope work, the terminology stays mostly the same.
Understanding the basic parts of a rope and knot helps you follow tutorials, read diagrams, and tie knots correctly with more consistency and confidence.
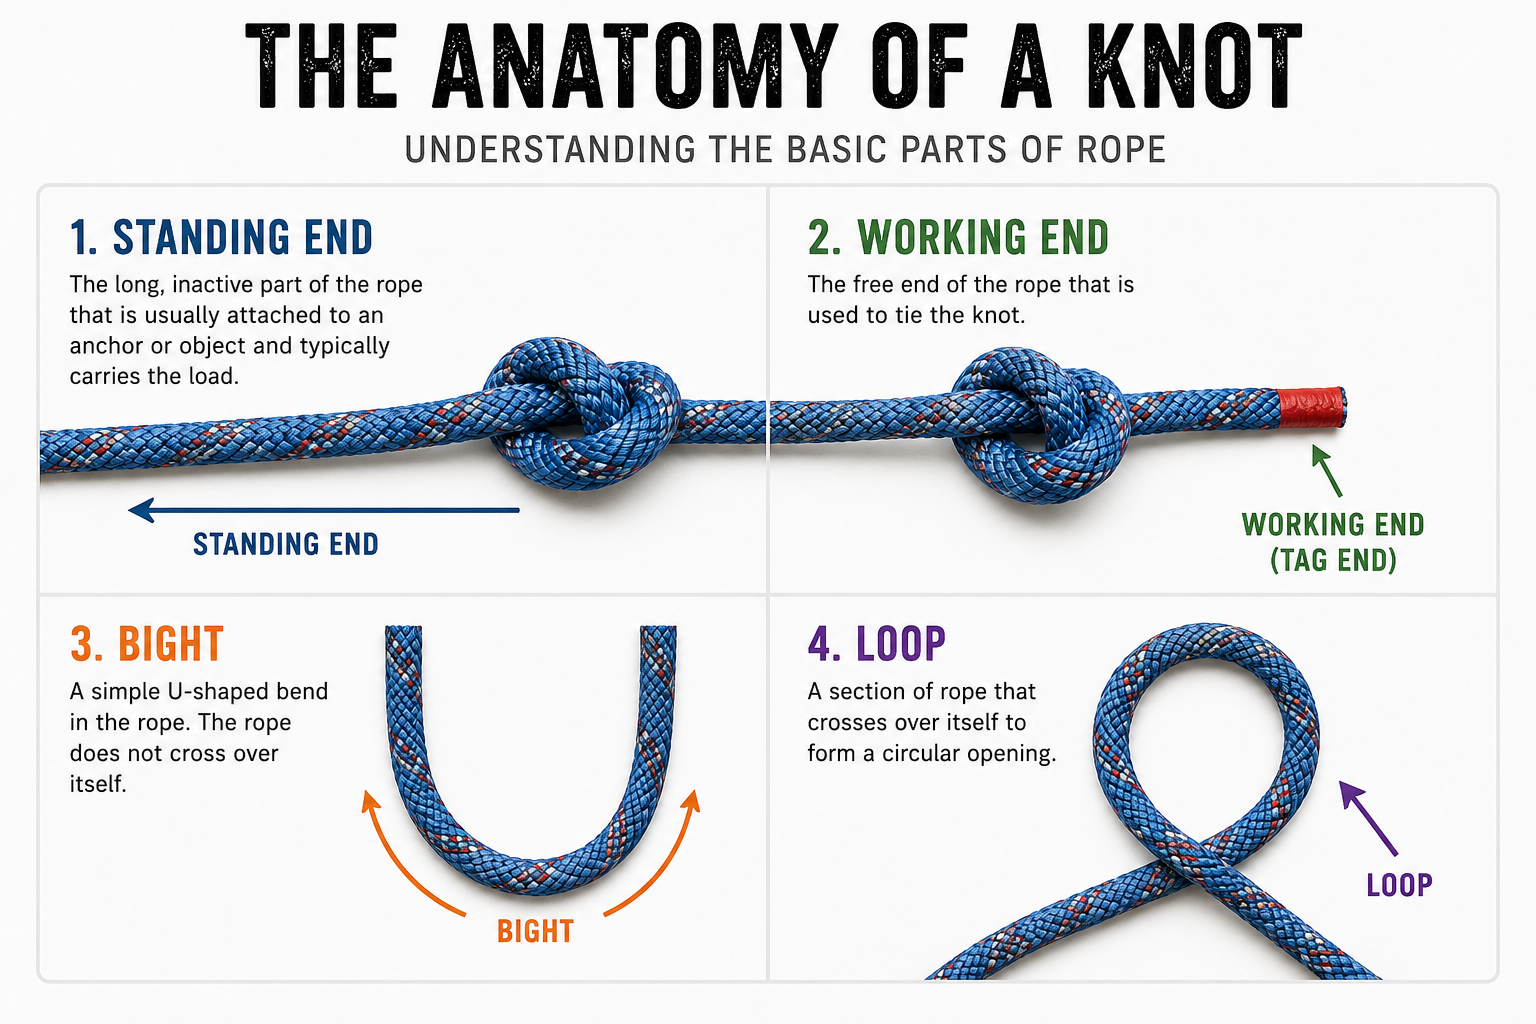
The Standing End
The standing end is the long, inactive portion of the rope that is not being manipulated while tying the knot. In most knots, this section carries the load or tension once the knot is tightened. When instructions say to “wrap the working end around the standing end,” this is the section they are referring to.
The Working End (Tag End)
The working end, sometimes called the tag end, is the free end of the rope used to form the knot. This is the section you pass through loops, wrap around the standing end, and manipulate while tying. In most knot tutorials, nearly every movement involves the working end. Many knot failures happen because the tag end is left too short after tightening. For safety-critical knots, always leave an adequate tail after dressing and tightening the knot.
The Bight
A bight is a curved section of rope created without crossing the ends over each other. It forms a simple U-shape in the rope. Many knots begin by forming a bight, and several categories of knots are specifically tied “in the bight,” meaning they can be tied without access to the rope’s ends. Understanding the difference between a loop and a bight is important. A loop crosses over itself, while a bight does not.
The Loop
A loop is formed when the rope crosses over itself to create a circular opening. Loops are one of the foundational building blocks of knot tying. Some knots create fixed loops that maintain their size under tension, while others create adjustable loops that can slide or tighten. Loops are commonly used for: Attaching rope to objects, Creating handles or anchor points, Climbing and rescue systems, Fishing line attachments. Learning how loops behave under tension is one of the keys to mastering knot tying.
Dressing the Knot
“Dressing” a knot means arranging all parts neatly before fully tightening it. A poorly dressed knot may weaken the rope, slip unexpectedly, or jam under load.
A properly dressed knot: Tightens evenly, Reduces unnecessary friction, Maintains maximum strength, Is easier to inspect visually
Many beginners rush to tighten knots before dressing them properly. Taking a few extra seconds to align the wraps and turns can dramatically improve knot performance.
Setting the Knot
After dressing the knot, it should be fully “set” by applying tension. Setting removes slack and locks the structure into place.
Different knot types require different amounts of force to properly set. Fishing knots, for example, are often lubricated before tightening to reduce friction and heat damage to the line.
A knot that has not been properly set may loosen during use.